The VoroCrust-Meshing test suite is executed via the CTest tool, a part of the CMake package, which runs the automated tests that have been developed.
Generally you will probably not need to run this but it’s not a bad idea after building the code to run the test suite for a sanity check.
Note: the test suite includes some larger models to mesh as well but these can be time consuming and are disabled by default. To enable them, set the VOROCRUST_ENABLE_LONG_TESTS parameter in CMake during configuration time.
Testing on OSX and *nix systems
Running the test suite on OSX and *nix systems via the command line can be done in one of two different ways. The first method is to just run make with the ‘test’ target specified:
$ make test
If you want more control over the test suite, you can run ‘ctest’ directly:
$ ctest
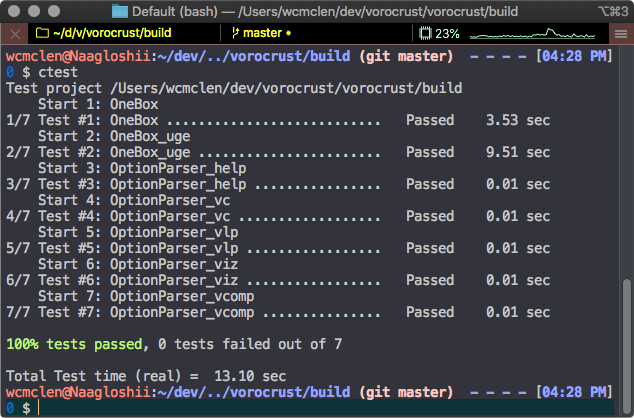
Output from CTest will look something similar to the following image:
If you need finer control of what CTest is doing or you can add some options to it. For example, if you have a system with a lot of cores available, you can speed up testing by running multiple tests concurrently by adding the ‘-j N’ argument where N is the number of concurrent tests you would like to run.
$ ctest -j 4
Be aware that this is the test concurrency and not the total # of cores to use — for example VoroCrust-Meshing has some tests that use 4 cores so if you provide ‘-j 4’ you could actually use 16 physical cores on your system.
Other useful options to CTest are:
- -R “regular expression” – This will run test(s) whose test names match the given regular expression.
- -E “regular expression” – This will exclude test(s) whose test names match the given regular expression.
- -VV – Show the console output of the test when running it.
For example, say we wish to just run the “OneBox” test but not “OneBox_uge” or “OneBox_omp_4t” and see the console output. Our ctest command line could be:
$ ctest -R "OneBox" -E "_uge|_omp" -VV
Which would generate output like this:
UpdateCTestConfiguration  from :/Users/wcmclen/dev/vorocrust/vorocrust/build/DartConfiguration.tcl
Parse Config file:/Users/wcmclen/dev/vorocrust/vorocrust/build/DartConfiguration.tcl
UpdateCTestConfiguration  from :/Users/wcmclen/dev/vorocrust/vorocrust/build/DartConfiguration.tcl
Parse Config file:/Users/wcmclen/dev/vorocrust/vorocrust/build/DartConfiguration.tcl
Test project /Users/wcmclen/dev/vorocrust/vorocrust/build
Constructing a list of tests
Done constructing a list of tests
Updating test list for fixtures
Added 0 tests to meet fixture requirements
Checking test dependency graph...
Checking test dependency graph end
test 1
    Start 1: OneBox

1: Test command: /Users/wcmclen/dev/vorocrust/vorocrust/build/vorocrust "-vc" "vc.in"
1: Test timeout computed to be: 120
1: ***********************************************************
1: *                                                         *
1: *  Program    : VoroCrust                                 *
1: *  Version    : Development Branch                        *
1: *  Git SHA1   : e50183db94954a1c1d2bd7156c2bb4bc6f6f120f  *
1: *  Commit Date: 2020-06-02 12:01:09 -0600                 *
1: *  Run Date   : 2020-06-02 12:10:29 -0600                 *
1: *  Website    : https://vorocrust.sandia.gov              *
1: *                                                         *
1: ***********************************************************
1: VoroCrust::Input Data:
1:   * Input Mesh = OneBox.obj
1:   * Maximum Sphere Radius = 10000
1:   * Lipschitz Const = 0.25
1:   * VC Smooth Angle Threshold = 60
1:   * A clean input model
1:   * Number of OpenMP threads = 1
1: VoroCrust::Reading obj file:
1:   * Number of Input mesh points = 8
1:   * Number of Input mesh faces = 12
1: VoroCrust::Initiating VoroCrust Sampler ..
1:   * VoroCrust is using 1 / 10 available threads!
.
(snipped)
.
1:   * Number of Surface seeds = 1084
1:   * Number of interior Volume seeds = 79
1:   * executed in 0.038588 seconds!
1: VoroCrust::Generating Interior Seeds via Spoke Darts:
1:   * Number of added seeds 43
1:   * Number of all seeds 1206
1:   * executed in 0.046427 seconds!
1:   * All Voronoi Seeds are saved in seeds.csv
1:
1: *** VoroCrust::Mission Accomplished in 3.21587 seconds! ***
1/1 Test #1: OneBox ...........................   Passed    3.25 sec

The following tests passed:
    OneBox

100% tests passed, 0 tests failed out of 1

Total Test time (real) =   3.27 sec
Testing on Windows using Visual Studio
Running the test suite from the Visual Studio GUI is easy to do as well.
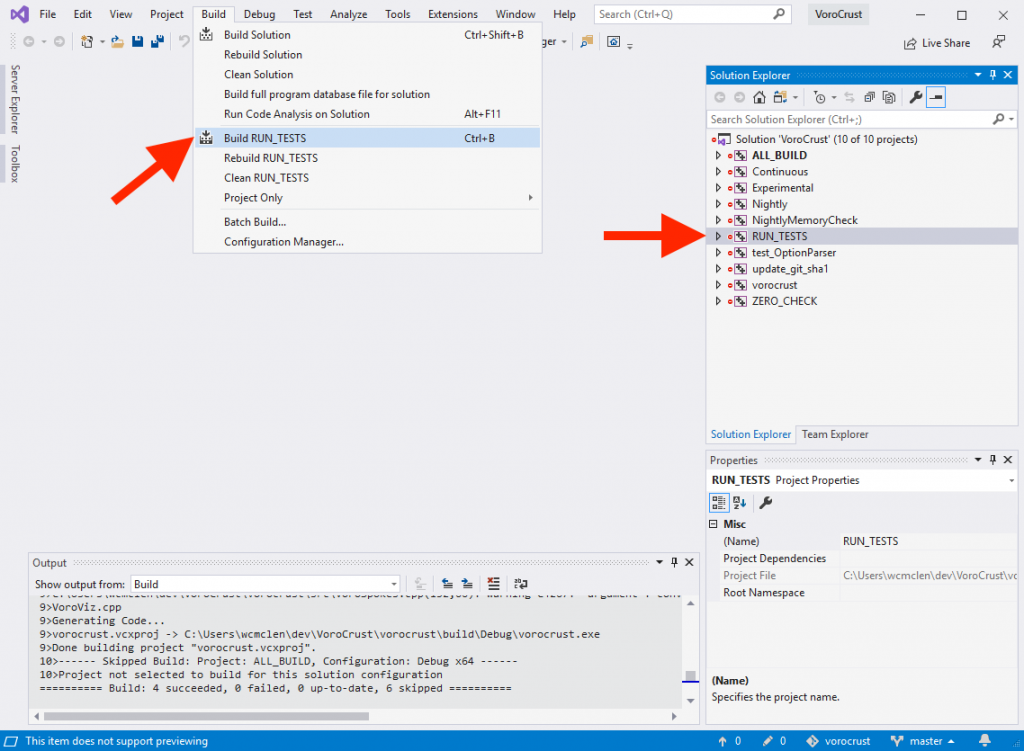
After you have successfully compiled VoroCrust-Meshing, select the RUN_TESTS entry in the Solution Explorer and then select the Build RUN_TEST option from the Build Menu, or press CTRL-B to run the tests. The image below shows what this looks like in Visual Studio 2019.
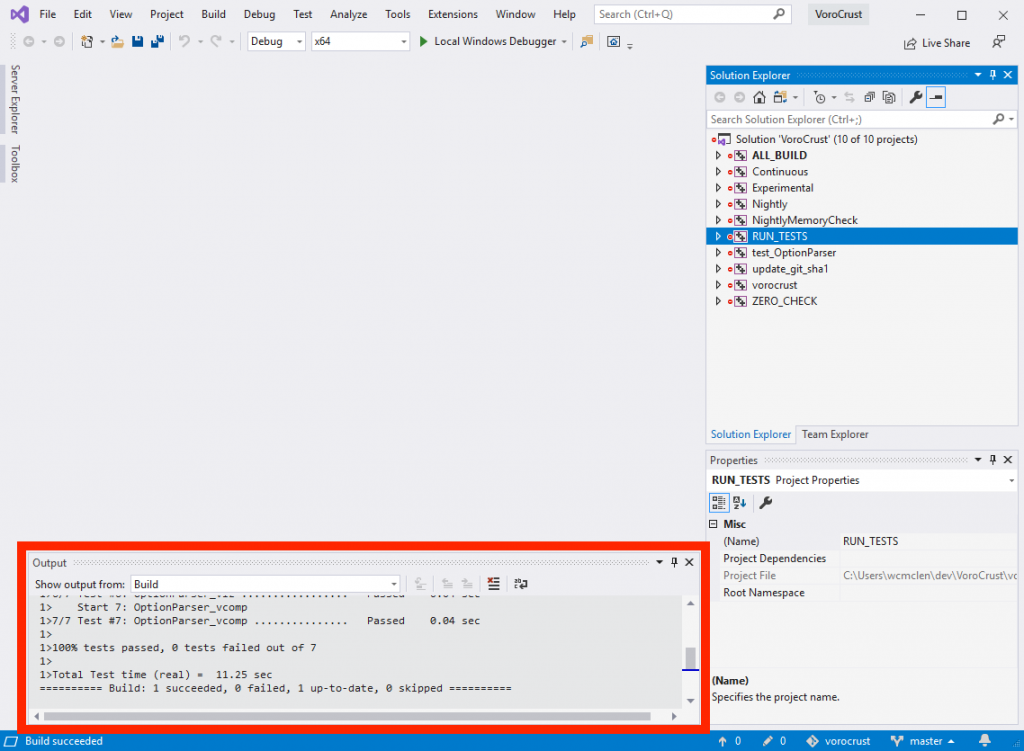
This should run the test suite. You will see the output from the tests in the Output window in the GUI.
If the test suite executes successfully, you should see a line that looks like:
100% tests passed, 0 tests failed out of NNN
At this point you have compiled and tested VoroCrust-Meshing.
Output and Logfiles
VoroCrust-Meshing generates a number of output files when it runs.
When running the CTest examples in the build directory these will be placed in the directory build/tests/<problem name>/. For example, the output from our OneBox test will be found in build/tests/OneBox.
VoroCrust-Meshing also generates a useful log file in the output directory called VoroCrustLog.txt which contains a copy of the console output from VoroCrust-Meshing. These can be useful to look at when running tests if you do not wish to run the verbose mode of ctest.