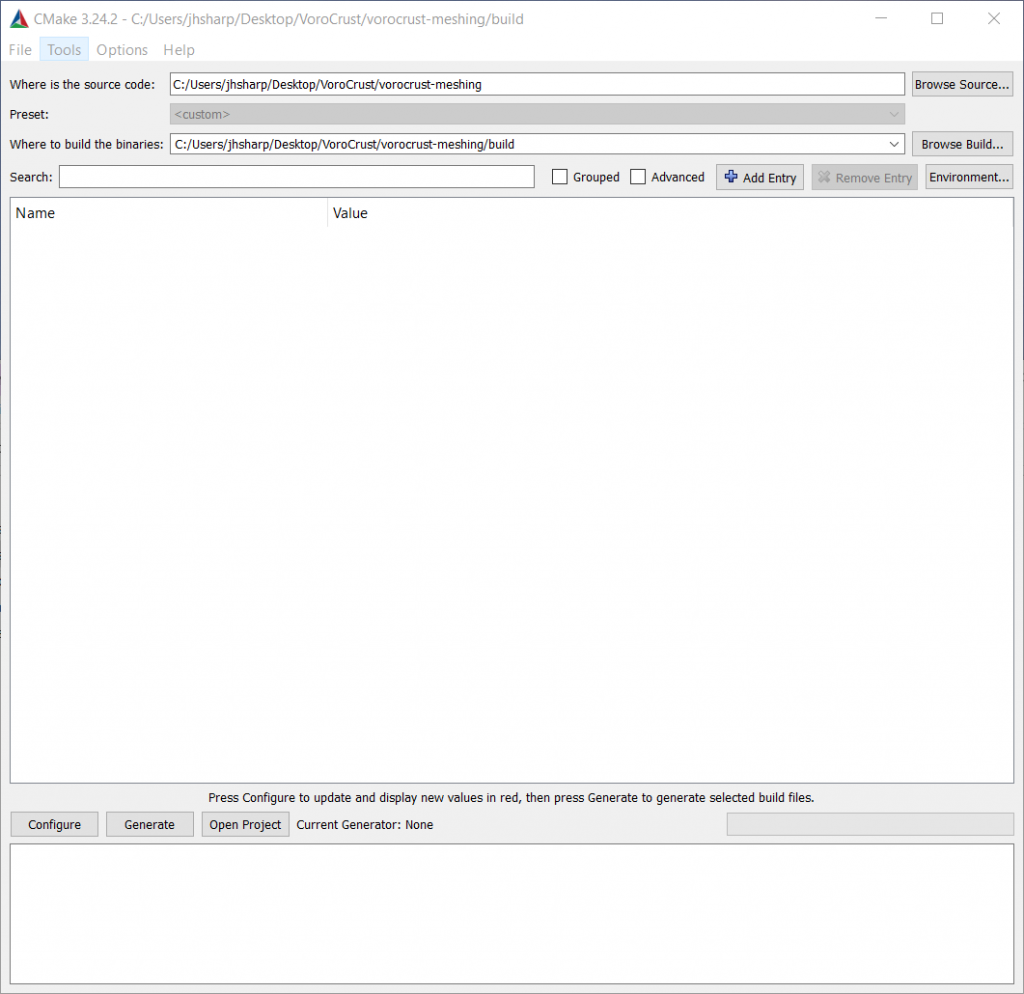
Configuring VoroCrust-Meshing on Windows is easiest using the CMake GUI application. The elements are essentially the same as configuring on the command line as the primary two things that CMake needs to know about are:
- Where is the source code — This is the location of the VoroCrust-Meshing source. Note: this is NOT the location of the source files (.cpp, .h, etc.) but rather the directory that contains the top-level CMakeLists.txt file. In our case, this will be $HOME/VoroCrust-Meshing/vorocrust-meshing since that CMakeLists.txt file is located in the root directory of the repository.
- Where to build the binaries — This is the location of your build directory. In CMake, we never build our code from the source directory. We typically just put this in a build directory inside the VoroCrust-Meshing source location, but it can be anywhere. CMake’s best practices recommend creating a vorocrust-meshing-build directory that is at the same level as the VoroCrust-Meshing source directory. You can do whichever you prefer.
When the form is filled in, your screen should look like the following image:
You will notice that the main window has no information in it. This will be filled after running a configuration step. To do so, click the Configure button.
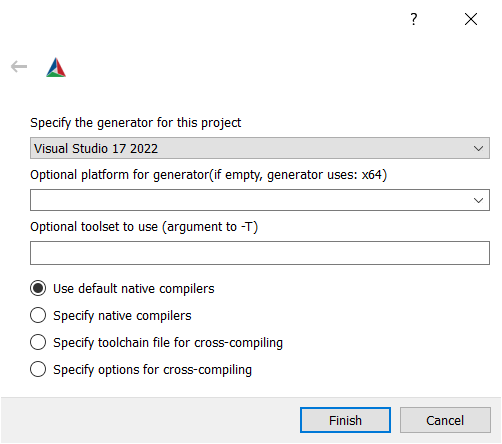
Before running the configuration step, CMake may ask you for the compiler that you’d like to use. Generally, we will just leave this set to the defaults unless you need to make it use some alternative compiler.
Once you have the paths to the correct directories for your configuration entered in, click the Configure button to run the configure step.
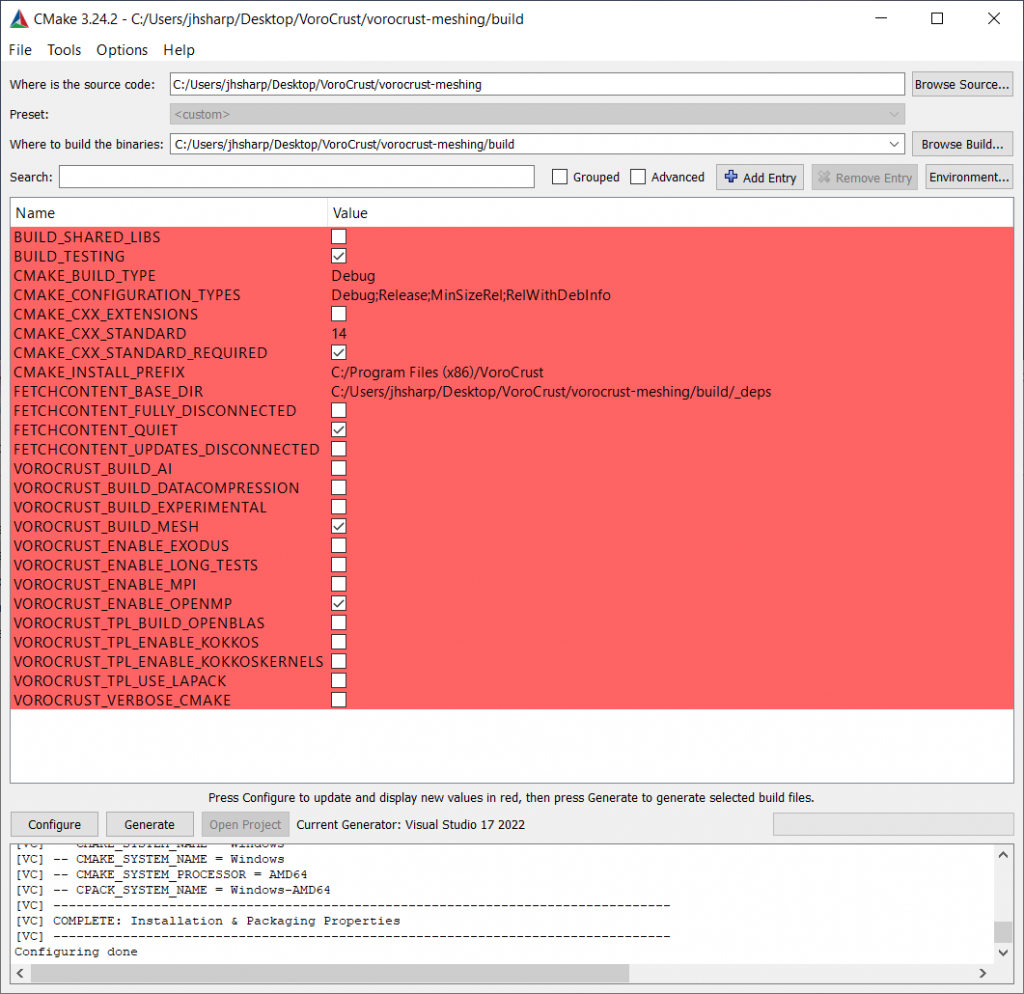
After the Configure step has executed, the main window will be populated with some Key/Value pairs populated with the default values. In most cases you will not need to change these from the defaults. If you do change any settings, you will need to re-run the Configure step. The lines highlighted in red indicate “new” properties discovered by CMake from the previous configuration round. Some options you might consider modifying:
- VOROCRUST_ENABLE_WARNINGS – Check this to enable additional compilation warnings.
- VOROCRUST_VERBOSE_CMAKE – Check this to enable extra verbosity in CMake. This is mostly useful to the VoroCrust-Meshing team for troubleshooting configuration issues.
- VOROCRUST_ENABLE_LONG_TESTS – The default test suite for VoroCrust-Meshing is set up to run fairly quickly, enabling this turns on the full test suite which includes some longer tests. Enabling this could result in the test suite taking hours to finish so enable only if you need it.
- VOROCRUST_ENABLE_OPENMP – This option defaults to ON and controls whether or not VoroCrust-Meshing is built with OpenMP.
- CMAKE_BUILD_TYPE – This defaults to “Debug” which includes debug symbols in your build. This can also be changed to “Release” to build VoroCrust-Meshing with stronger compiler optimization but doing so will limit the utility of debuggers if something goes wrong. Generally speaking, it is fine to leave the default.
- CMAKE_INSTALL_PREFIX – This controls the installation location for VoroCrust-Meshing if you wish to run the “make install” step. The vorocrust-meshing binary will be placed in ${CMAKE_INSTALL_PREFIX}/bin/vorocrust-meshing.
Once you have the project fully configured without errors and are ready to generate the build files you will click the Generate button. This will create the system-appropriate build files that you will use to compile the code, most likely this is a Makefile on *nix or OSX systems and a VoroCrust-Meshing.sln file for Windows Visual Studio.
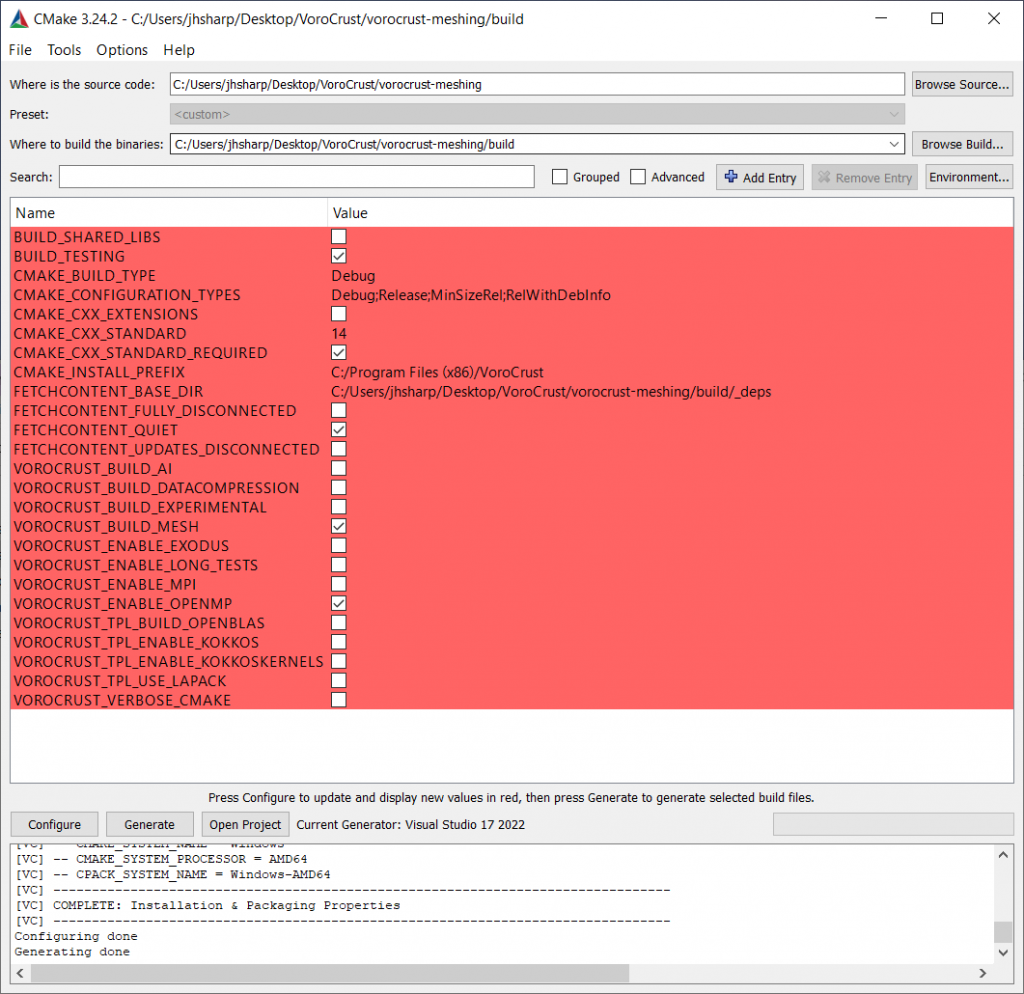
After the Generate step completes, the project files for VoroCrust-Meshing will be in the build directory that you selected in the first step. On OSX and *nix systems this will most likely be a makefile and on Windows systems using Visual Studio this will be VoroCrust-Meshing.sln.
On Windows, just double click the .sln file and it should open the project in Visual Studio. From there you can build and test VoroCrust-Meshing.
‹ Prepare Your Development Environment | Building on Windows ›